
7 Tips for Choosing the Right Duct Cable
A duct cable may look like a simple line on a specification sheet. In practice, its construction can affect installation time, signal performance, and long-term maintenance. A cable pulled through a crowded conduit faces different demands from one placed in a clear, protected route. Small details matter. Jacket material, conductor size, shielding, and bend limits can each influence the result.
Choosing by price alone is tempting. It can also leave important questions unanswered. Will the cable fit the duct? Can it handle the expected environment and required data rate? Are its ratings and test documents clear? These checks help buyers compare products using more than a product name or a supplier’s broad claim. Verify details against the project design, manufacturer data sheets, and applicable installation requirements. When specifications are unclear, ask the manufacturer or a qualified installer before ordering.
The seven tips in this guide offer a practical way to assess duct cable options. They cover route conditions, cable dimensions, performance needs, materials, installation constraints, documentation, and supplier support. Not every project needs the most advanced cable. In some cases, a simpler choice is better. That judgment takes care, and even a sound checklist cannot replace site-specific review. Use these points to narrow your options, spot missing information, and make a decision that fits the installation—not just the quote.
Understand Duct Cable Types and Their Applications
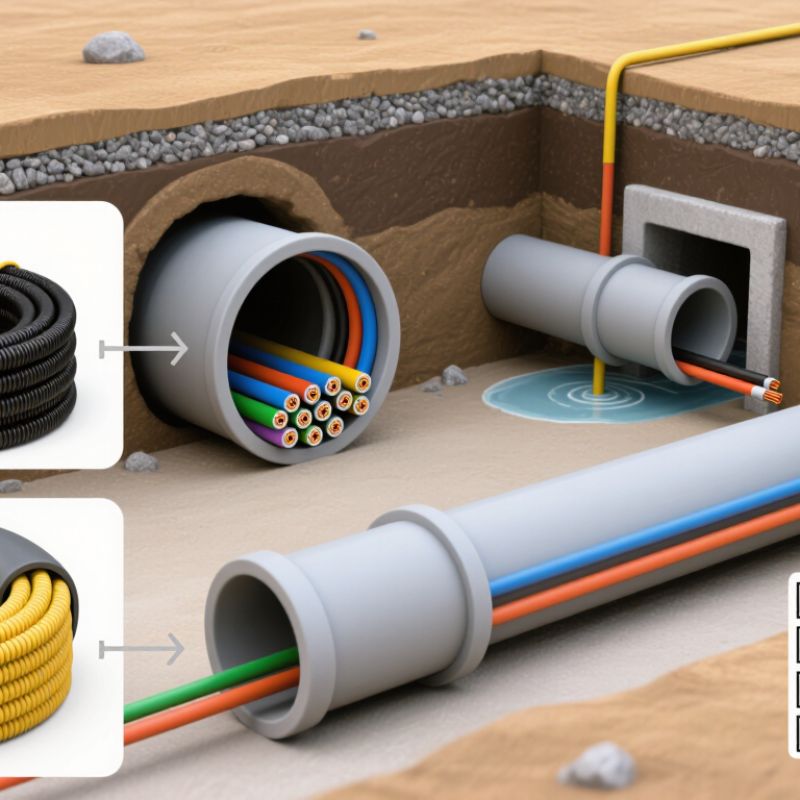
Duct cable choice begins with the route, not the catalog. Loose-tube designs protect fibers inside gel-filled or dry water-blocking tubes, making them common in outdoor ducts where moisture and temperature swings are concerns. Tight-buffered cable has a closer protective coating around each fiber and can simplify handling near indoor termination points. Check its environmental rating before placing it in a damp pathway. Details matter.
Microduct cable is slimmer and suited to air-assisted installation through small-diameter ducts. It can help when existing pathways are crowded, though installation depends on duct condition, length, bends, and equipment. Conventional duct cable is typically pulled through larger pathways. A useful shortcut, but not a guarantee: match cable diameter and duct fill to the installer’s method and project specifications.
The demand backdrop is substantial: the International Telecommunication Union’s Facts and Figures 2024 report estimates that 5.5 billion people, or 68 percent of the global population, used the internet in 2024. That growth makes maintainable access routes valuable, but the right cable still depends on the site. For a wet underground duct, verify water-blocking construction; for frequent access or future expansion, assess spare duct capacity and pulling tension. Not always obvious. Record the cable type, route, and bend points before installation; crews may otherwise face avoidable troubleshooting later.
7 Tips for Choosing the Right Duct Cable: Understand Duct Cable Types and Their Applications
| Tip | What to Check | Suitable Cable Type or Feature | Typical Application | Selection Guidance |
|---|---|---|---|---|
| 1. Match the cable to the duct installation method | Determine whether the cable will be pulled through a duct or installed by blowing through a compatible microduct system. | Standard duct-rated cable for pulling; lightweight microduct cable designed for blown installation. | Underground pathways, campus networks, and fiber distribution routes. | Confirm that the cable diameter, construction, and installation method are compatible with the duct system. Blown installation requires suitable equipment and installation conditions. |
| 2. Choose the fiber type for the required link | Check the required data rate, link length, optical equipment, and planned network design. | Single-mode fiber, commonly OS2; multimode fiber, such as OM3 or OM4, where supported by the system design. | Single-mode is widely used for longer links and outside-plant networks; multimode is often used for shorter links within buildings or facilities. | Fiber category alone does not establish achievable distance. Verify the transceiver specifications, data rate, and link budget for the complete system. |
| 3. Select the construction for the environment | Consider exposure to moisture, temperature changes, rodents, crushing, and other physical hazards. | Outdoor loose-tube fiber with suitable water-blocking materials; armored construction where additional mechanical protection is needed. | Buried duct routes, outdoor pathways, and installations in areas with elevated physical risk. | Water-blocking materials help limit water migration within the cable, but they do not replace properly sealed ducts or approved installation practices. Armor can increase cable size and weight. |
| 4. Check the required fiber count and cable format | Estimate current connections and reasonable future capacity, while considering the duct’s available space. | Loose-tube cables for many outdoor routes; ribbon or high-fiber-count designs for applications requiring dense fiber capacity. | Backbone routes, data-center interconnect pathways, and high-capacity campus networks. | Compare the cable’s outside diameter and minimum bend radius with duct capacity, access points, and splice enclosure requirements. |
| 5. Verify pulling and bend limits | Review maximum pulling tension, minimum bend radius, sidewall pressure, and installation temperature limits. | A cable construction rated for the planned pulling method and route geometry. | Long duct runs, routes with bends, and installations with limited access. | Use the cable manufacturer’s documented limits for both installation and the finished installation. Do not assume that the cable’s static bend radius is the same as its installation bend radius. |
| 6. Confirm building-entry and fire requirements | Identify where the cable enters a building and whether it will pass through spaces with specific fire or smoke requirements. | Outdoor-rated cable for the exterior route, with an approved transition or indoor-rated section where required by applicable codes. | Routes connecting outdoor ducts to equipment rooms, risers, or other indoor spaces. | Outdoor or duct suitability does not automatically mean a cable is approved for every indoor space. Check local codes and the cable’s listed use before installation. |
| 7. Check compatibility and total installation cost | Review duct fill, pulling or blowing equipment, splice methods, connector plans, and maintenance needs. | A cable whose dimensions and construction match the existing pathway and the project’s termination plan. | New installations, duct upgrades, and network expansions in existing pathways. | Compare the full installed cost—not just the cable price—including labor, accessories, pathway preparation, testing, and future access requirements. |
Note: Cable ratings, installation limits, and code requirements vary by product and jurisdiction. Confirm the cable documentation, pathway conditions, and applicable local requirements before installation.
Related Posts
-

2026 Best Fibre Optic Network Solutions for Global Buyers
-

What is a fibre network and how does it work?
-

How to Generate Fibre Leads for Your Business Growth?
-
10 Essential Tips for Choosing the Right Duct Cable for Your Networking Needs
-

Top 10 Best Aerial Cables for High-Speed Internet Connectivity
-
How to Install Cable Ducting?