
How to Install Cable Ducting?
Cable ducting protects cables, keeps routes organized, and makes future maintenance easier. Good results depend on more than neat cuts. The route, duct size, fixing method, and cable capacity all matter. A crowded duct can make pulling cables difficult and may limit later changes. Small details count.
This guide explains cable duct installation from planning through final inspection. It covers measuring the route, choosing suitable ducting, preparing surfaces, cutting sections, fitting bends and covers, and securing the finished run. You will also learn when to check manufacturer instructions and seek help from a qualified electrician, particularly where work involves existing electrical circuits. Keep tools, fixings, and a tape measure nearby. A clean, dry wall is easier to mark accurately.
A common planning miss is forgetting how cables enter and leave the duct. Mark those points before cutting. Check corners, doorways, and access panels, too. Even careful measurements can be slightly off, so test-fit sections before fixing them permanently. No single method suits every wall or installation. The advice here offers a practical starting point, not a substitute for site-specific judgment. Take time to inspect the completed run: covers should sit securely, edges should be smooth, and cables should not be pinched. Done carefully, the work looks cleaner and remains easier to service.
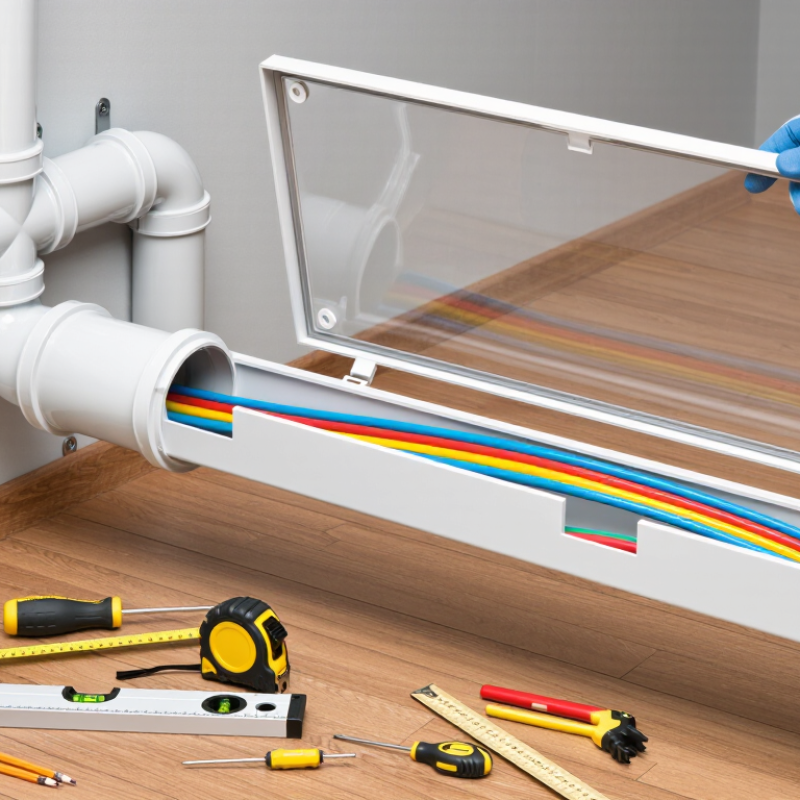
Assess the Cable Route and Choose the Appropriate Ducting
Before selecting cable ducting, walk the entire route and note where cables enter, exit, or change direction. Measure the distance, including vertical runs and turns. Measure twice. Check for pipes, hot surfaces, damp areas, moving equipment, and spots where people may knock or step on the duct. A route that looks clear on a drawing may be crowded above a ceiling or behind a cabinet. Take photos and mark obstacles; these small details can prevent awkward cuts later.
Choose ducting suited to the environment and the cable load. Outdoor or damp locations may need more weather protection than a dry indoor wall. Estimate the cable bundle’s size, then allow room for additions and airflow rather than packing the duct tightly. Leave enough space at bends so cables are not sharply kinked. For exposed runs, a rigid duct can offer better impact protection; in tight spaces, a flexible section may help, though it can be harder to keep neatly supported. Check the duct’s dimensions, lid access, and fixing points against the actual route. There is rarely a perfect path. If a proposed run requires repeated sharp turns or blocks future access, revise it before cutting.
How to Install Cable Ducting? - Assess the Cable Route and Choose the Appropriate Ducting
| Route section | Conditions to assess | Example cable bundle | Suggested duct size | Ducting type and installation notes |
|---|---|---|---|---|
| Indoor office wall | Dry interior; straight run of 8 m; two gentle bends; accessible for future changes. | 4 data cables, each approximately 8 mm in diameter. | 40 × 25 mm duct | Use a lidded, non-metallic duct. Keep bends smooth and leave space for additional cables; separate data cabling from power wiring as required by local regulations. |
| Workshop wall near floor level | Indoor route exposed to occasional knocks; 12 m run; one junction point. | 6 control cables, each approximately 10 mm in diameter. | 60 × 40 mm duct | Consider metal ducting or a suitably impact-resistant non-metallic system. Secure it at intervals recommended by the duct manufacturer and protect cable entries with bushes or edge protection. |
| Outdoor building wall | Direct sunlight and rain; 15 m run; temperature changes and possible water ingress. | 3 power cables, each approximately 12 mm in diameter. | 50 × 50 mm duct | Choose a ducting system rated for outdoor and UV exposure. Use compatible fittings, plan for thermal movement, and avoid creating low points where water can collect. |
| Raised floor to equipment cabinet | Concealed route; 5 m run; limited access after floor panels are replaced. | 8 data cables, each approximately 7 mm in diameter. | 60 × 40 mm duct | Use a duct with a secure cover and smooth internal surfaces. Check the complete route for obstructions before installation and provide accessible draw-in points where needed. |
| Concrete wall or floor crossing | Route passes through a structural surface; fire-rated barrier may be present. | 2 cables, each approximately 14 mm in diameter. | 40 × 40 mm duct, subject to opening and fire-stopping requirements | Check for concealed services before drilling. Maintain required fire compartmentation with an approved fire-stopping system, and do not cut structural elements without the necessary approval. |
Planning note: These are illustrative selections, not a substitute for site measurements or local electrical and building requirements. Confirm cable outside diameters, duct internal dimensions, bend limits, support spacing, environmental ratings, segregation rules, and permitted fill before installation.
Related Posts
-
Top 10 Cable Duct Installation Types for Global Buyers
-

Why Choose Fibre Optic Lighting for Your Next Project?
-

Top 10 Best Aerial Cables for High-Speed Internet Connectivity
-
Top Tips for Choosing the Right FO Cable for Your Needs?
-

2025 Guide: How to Optimize Your Fibre Cable Installation for Maximum Efficiency
-

10 Essential Tips for Choosing the Right Fibre Optic Cable for Your Needs